How to Clean a Car AC Evaporator Without Removing?
Are you fetching uneven air from your car’s ac system? Or having less cooling air? Then the major problem can be the failure of the ac evaporator. Unlike the other parts of the car, the ac evaporator may be deteriorating due to aging, or wear.
Sometimes cleaning the ac evaporator is proven a worthwhile step. Most of the time, it solves the problems, and the ac performance gets improved. You may not be aware of the procedure of cleaning. Have a brief look at this helpful guide and you will be able to clean the evaporator without removing it.
Contents
How does the ac evaporator work?
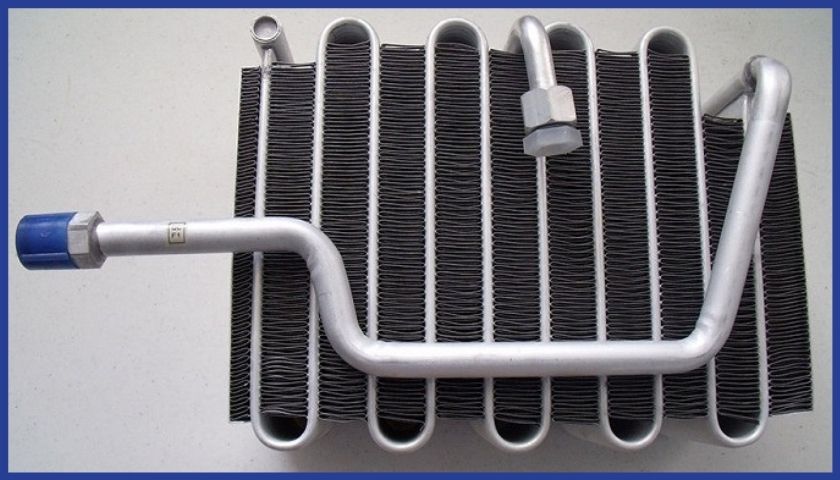
The evaporator is a significant component in the car’s ac system. It is a little radiator positioned inside the dashboard. This part has a freezing liquid refrigerant that guesses the heated air before going to the air-conditioning condenser. The process is continuously recited and supplies the cold air.
Though there are many pollutants and contaminants inside the car, manufacturers constantly improve the air filters and air ducting. An ac evaporator is an ideal place for growing mold and mildew because it becomes wet when the humid air is passing through it. The surface collects dust and pollen. Moreover, bacteria proliferate in such conditions. So the evaporator should be cleaned regularly.
How to clean a car ac evaporator without removing it?
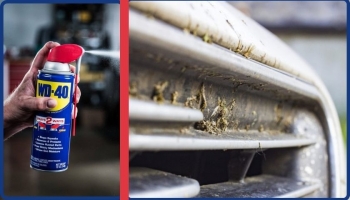
The ac evaporator needs regular maintenance. If you don’t clean them regularly, more problems will build-up, and the ac can not cool down inside the car. So starting up the process, you will need some tools: electric drill, screwdriver, RTV silicone cleaner, ac evaporator cleaning solution, and a water hose. Follow the steps below:
Step 1: Examine the car’s air conditioning system
The ac evaporator is found in the firewall, which detaches the passenger area from the engine cabin. Now you can easily access the car air conditioning section. You need to check the evaporator core so remove the plastic-encased box that is attached to the heat blower.
Step 2: Obtaining the car’s evaporator core
According to most cars, the evaporator includes a resistor block that is attached to the side of the heater box. By removing the blower fan, you can easily reach the evaporator core.
If you still don’t catch up with the part, you need to drill a 3/8-inch hole into the blower fan and evaporator case. The whole can be sealed later. In this way, you can reach the evaporator without removing the whole ac system.
Step 3: Spray the ac evaporator cleaner
Using a cleaner, you can get rid of the contaminants that are the main cause of ac failure. Now spray the ac evaporator cleaner through the hole that you have made earlier. The cleaner should directly go towards the evaporator core. Spray well so that the core surface is covered.
Usually, most cleaners come in a foam element so that it can stick with the heater box and clean the whole area smoothly. So fill the evaporator core thoroughly with the cleaner foam. Leave the cleaner for 30 minutes to set the foam. In this duration, the foam will perfectly perform the cleaning job and turn into a liquid then flow out.
Step 4: Rinse the area
When the cleaning form will flow out through the drain, you need to rinse the area with clean water. Here you can use a water hose. If you don’t have the water hose, you can use a spray bottle and rinse the area. Remember, use a light spray of water so that water doesn’t fill inside the car. The extra rinse completely wipes out the chemicals of cleaning foam.
Step 5: Re-install the blower fan
When the cleaning process is done, now you need to replace them in their position. Reinstall the blower fan that you removed earlier. In case you drilled the area, you can use RTV silicone to seal it.
As the evaporator needs to be cleaned again, you can accomplish it more effortlessly. Just remove the dried silicon with a screwdriver, and you have access to the evaporator core.
Step 6 : Dry the area
Use a dry towel and dry the area, or you can utilize a hairdryer for drying the area. Or drive the car for some time using a heater mode with a higher setting so that the moisture is blown away.
Step 7: Reposition the resistor block
When you are done with the internal cleansing process, you need to reposition the resistor block in place. It’s the final touch, and you have finally done the cleaning process without removing the evaporator system.
Tips:
- When washing out the evaporator core, be careful about other parts and secure water could not tpch them. It won’t be easy to dry and can damage the ac system.
- While drilling the evaporator case, be sure not to defect the core. A 3/8-inch will be a perfect hole for cleaning it.
- After cleaning, be sure there is no moisture in the heat box. Dry the area properly before reinstalling the resistor box.
Read next: Why does your car idle rough when you turn on the AC
Frequently Asked Questions (FAQ)
- When should you clean the ac evaporator?
It will be standard if you clean the ac evaporator every six months. It will resist the build-up of dust and debris. For maximum protection, you can wash it every month for healthy and pure air.
- What are signs of bad ac evaporator?
You may experience multiple aspects of a lousy ac evaporator. Like ac is not blowing cool air, ac is getting warm, ac doesn’t turn on, sometimes it shut down and again on. When you feel these issues you should check the evaporator and clean it. Contrary, you can talk with the serving center.
Final words
If you want superior air conditioning performance, the car ac evaporator needs to be clean properly. The cleaning process will be more straightforward with this guide. Once you successfully clean the evaporator core, the next time, it will be simpler for you. But always assure the safety measures.